How to forecast & photograph a display of the Northern Lights
Photographing the aurora borealis or northern lights can be an exciting experience for any photographer. However, capturing this amazing natural phenomenon can be a bit challenging without the right knowledge and tools. In this post, I will discuss some of the essential information that will help you capture stunning photographs of the northern lights, including the tools I use to forecast a solar storm event over at Solarham.net We’ll also cover some guidance with camera settings and lenses I recommend.
Let's first discuss the different types of aurora, which include the discrete aurora and diffuse aurora. The discrete aurora appears as distinct, often wavy, curtains of light, while the diffuse aurora appears as a more evenly distributed glow. The colors of the aurora depend on the type of gas molecule being ionized by the charged particles, with green being the most common color.
When viewing the diffuse aurora, it will appear as a dim, glowing light, often described as "curtains" or "veils" of light. The color of the aurora will be a pale green, with occasional shades of pink or purple. The northern lights can move and shift quickly, so be prepared to adjust your camera settings to capture the best shots.

The Aurora Borealis and Strong Thermal Emission Velocity Enhancement, also known as STEVE
Jackson Lake in Grand Teton National Park, Wyoming
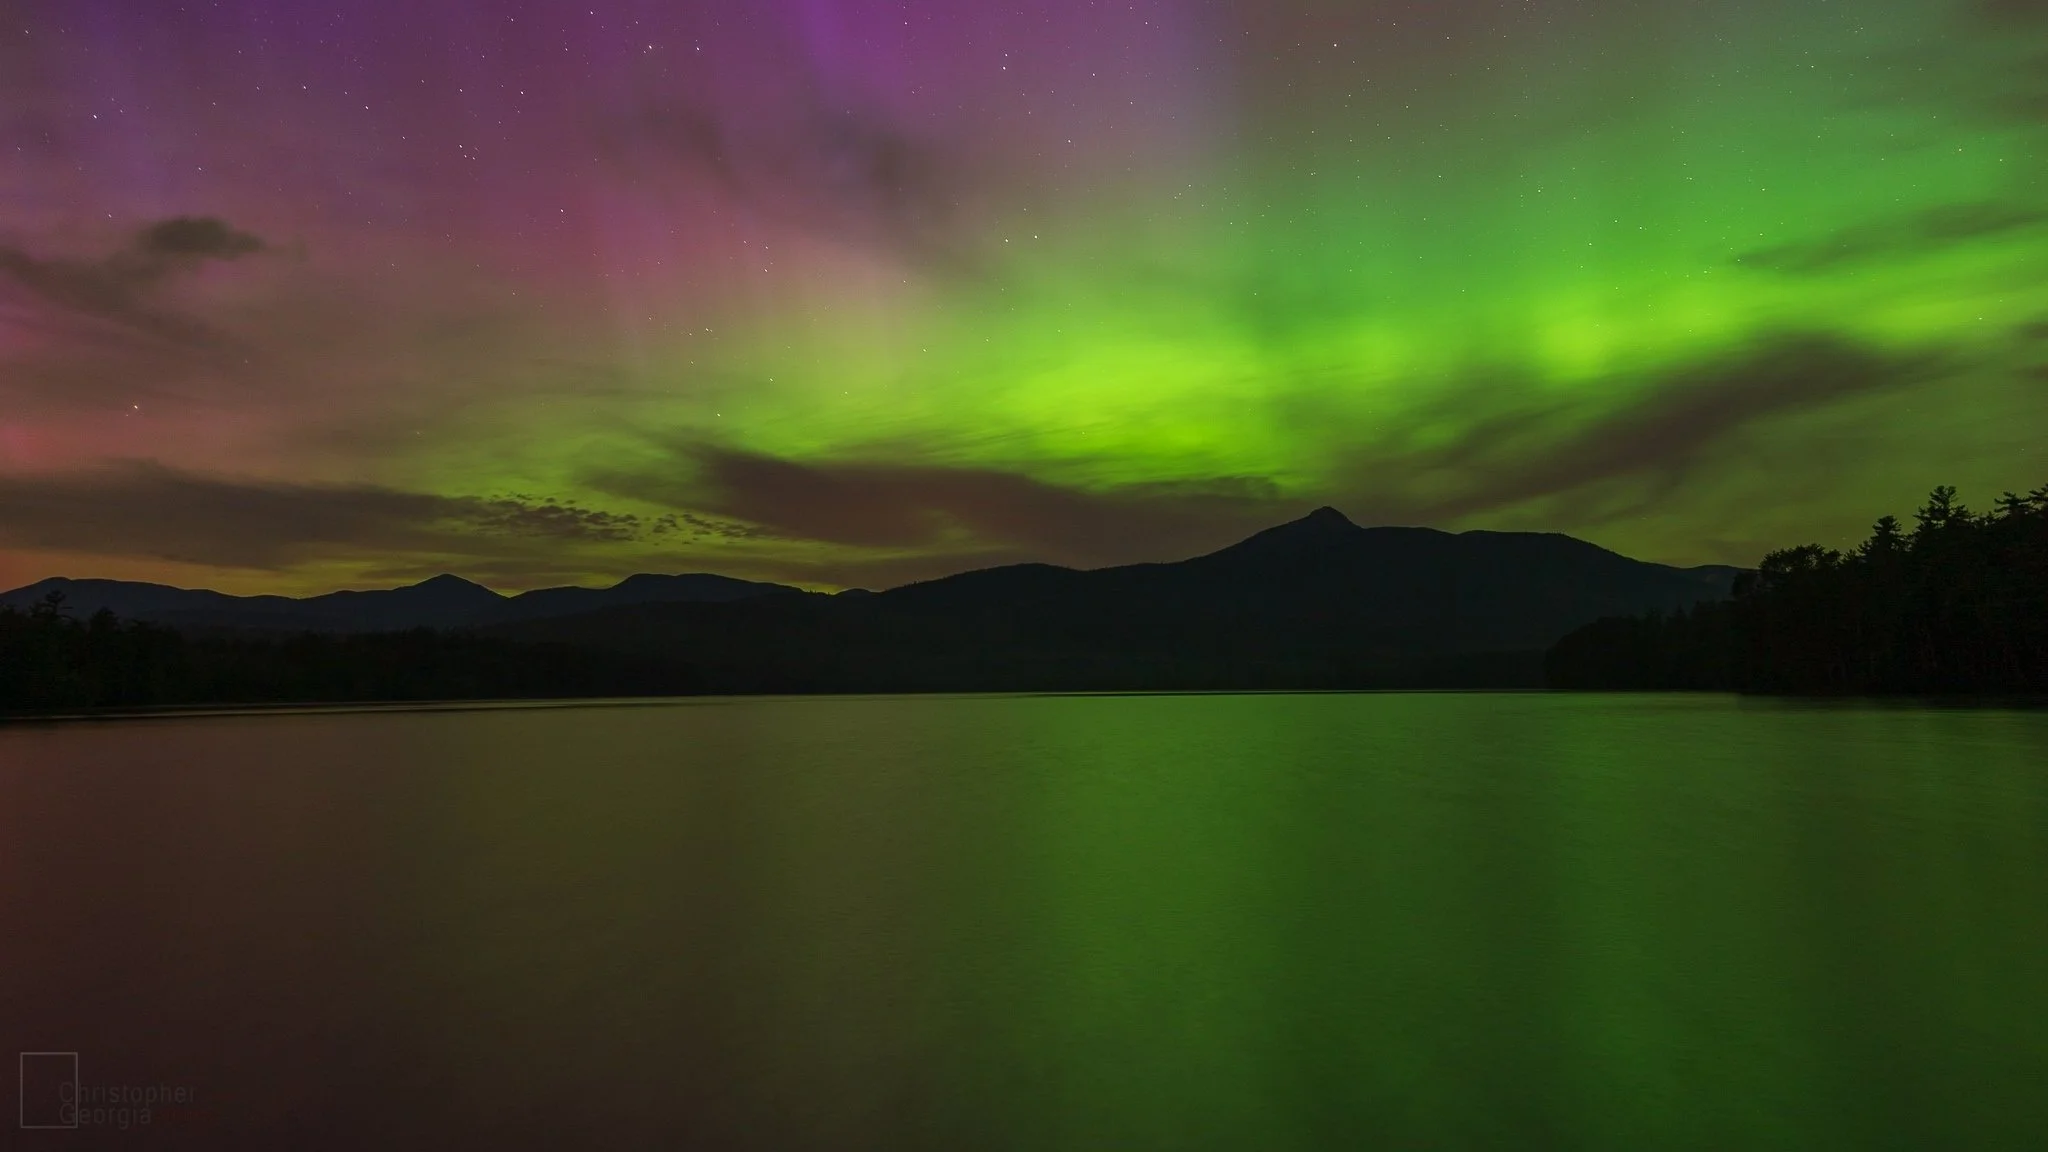
The Northern Lights over Mt. Chocorua in Tamworth, New Hampshire.
When photographing the aurora, I recommend using a wide-angle lens with a low aperture, such as f/2.8 or lower, to capture as much light as possible. I work with the Sigma 14mm f/1.8 ART, Sigma 24mm f/2 ART, and Sony 55mm f/1.8 to capture different scene perspectives. ISO settings will depend on the lighting conditions in your landscape, but starting with ISO 800-1600 can be a good place to begin. Your exposure settings will vary depending on the strength and brightness of the aurora and any ambient light. Starting with 8–15 second exposures can be a good place to begin dialing in your exposure duration. Since the aurora can move quickly, a longer exposure could blend spikes of light and cause them to appear softer than initially planned for. Also, consider utilizing an intervalometer to take a time-lapse sequence of exposures that can be combined to show the movement of the auroral activity over time. When shooting a time-lapse always remember to dial in your exposure first, then set your interval time to be longer than your exposure time.
Solarham.net is a website that provides real-time information about space weather and solar activity. This website offers valuable information about the solar wind, aurora activity, and other related space weather data that is crucial to capturing a photo of the northern lights. Here are a few of the tools that I use to help with forecasting a display of the northern lights:
Bz: An essential component of the interplanetary magnetic field (IMF) that can influence the geomagnetic activity around our planet is referred to as "Bz." Earth boasts a magnetic field enveloping it in a protective barrier known as the magnetosphere, which serves to deflect the solar wind. The intersection of Earth's magnetic field with the Sun's magnetic field occurs at a boundary called the magnetopause. Earth's magnetic field typically orients itself northward. However, when the Sun's magnetic field points southward, a condition known as "southward Bz," it has the potential to counteract Earth's magnetic field at the point of contact. In cases of a southward Bz, these two magnetic fields become interconnected, effectively creating an opening that could permit energy from the solar wind to enter Earth's atmosphere. The Bz is a part of the solar wind charts and measures the direction and strength of the interplanetary magnetic field. When the Bz is southward, it can help trigger auroras by allowing charged particles to enter the Earth's magnetic field. The chart below lists the Bz indicator. When studying this chart, seeing the Bz tipped southward or below the ‘zero’ marker for an extended period of time can be a sign of a strong auroral display.

Kp index: The Kp index is a measure of geomagnetic activity, ranging from 0 to 9. The higher the Kp index, the more active the aurora is likely to be. Find real-time data on the Kp index, which is a crucial indicator for predicting aurora activity here.
Statistical auroral oval: This is a graphical representation of the auroral oval, which shows where the aurora is most likely to be seen. This oval changes shape and size depending on the level of geomagnetic activity. The statistical auroral oval map can help you locate and plan for the best spots to see the northern lights.

In conclusion, capturing the northern lights can be a very rewarding experience. By understanding the different types of aurora, having the right tools and camera settings, and using the information available on Solarham.net you can better your chances to capture stunning photos of this incredible natural phenomenon.